Device connection & calibration
Detect and activate gloves, confirm the left/right connection, and complete gesture and bone-length calibration.
Device connection & calibration
Device detection & connection
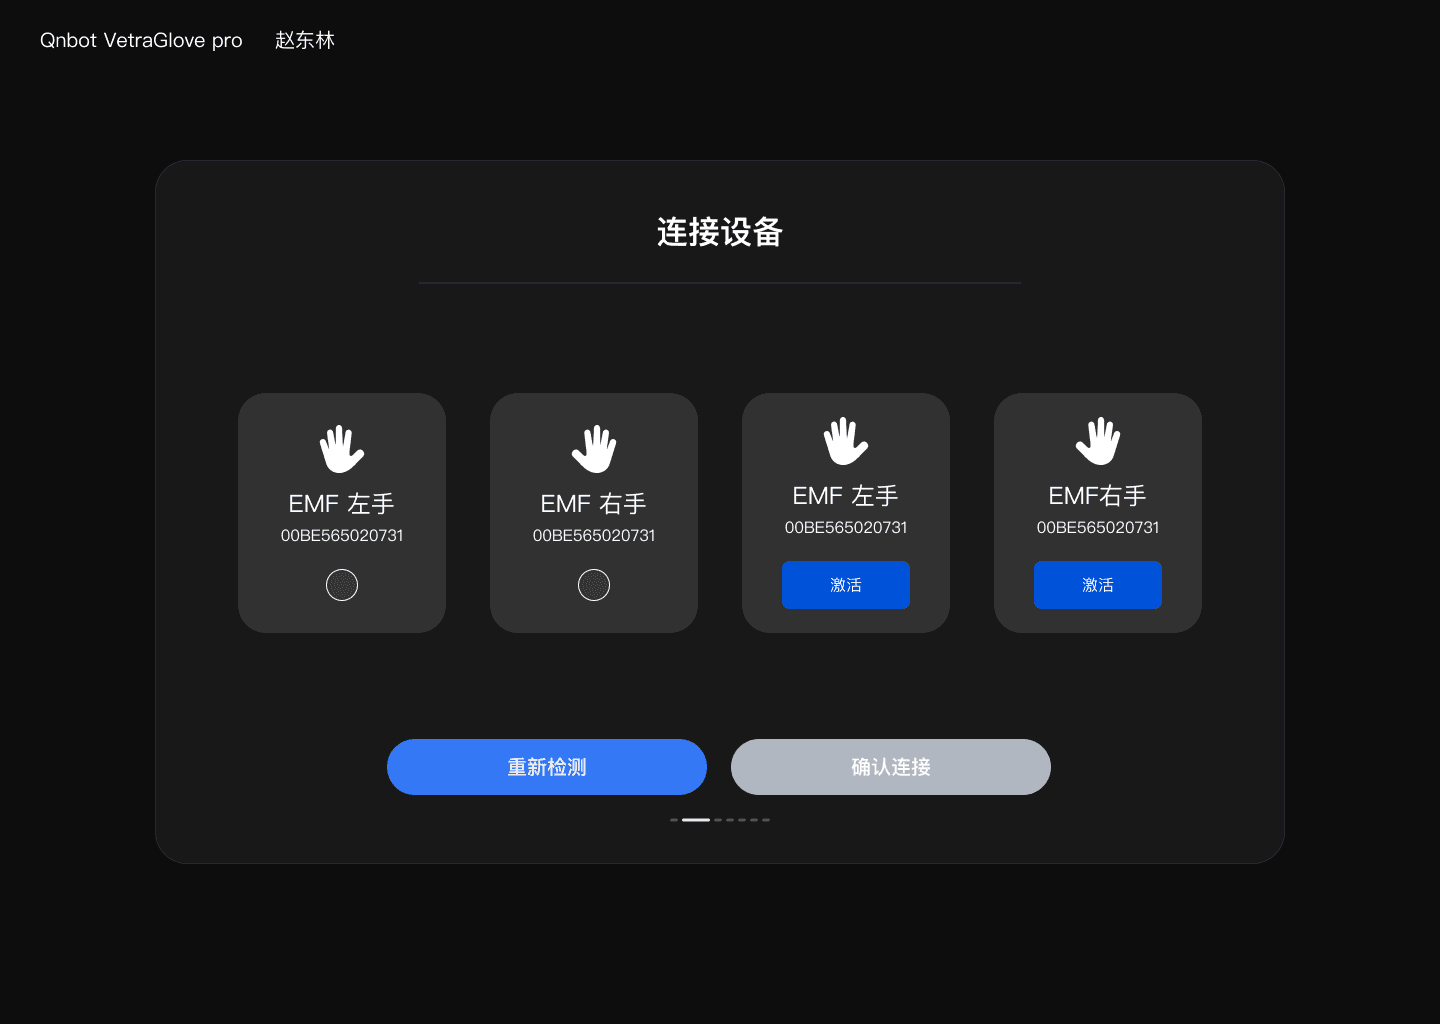
Device card information
| Field/state | Meaning and action |
|---|---|
| Device name | Identifies the device type, for example EMF left hand or EMF right hand. |
| SN | Device serial number. Record the complete SN for after-sales service or multi-device scenarios. |
| Activate | The device has been detected but is not yet licensed for use in the current environment; click it and wait for the activation result. |
| Activating… | The activation request is being processed; keep the network and the device connected. |
| Activation failed, please retry | Check the network, account permissions, and device connection, then click "Reactivate". |
| Connected | The device is connected to the current session. |
Standard connection workflow
- Click "Detect device connection" or "Detect again" and wait for the device list to refresh.
- Verify the device name, SN, and left/right hand. When several devices appear at once, confirm by SN first.
- For a device that is not activated, click "Activate" and wait for the state to update.
- Click a card to select the device for this session. You can select at most one left-hand and one right-hand device at a time.
- Click "Confirm connection". If the button is unavailable, check that at least one usable device is selected.
Selection constraint: a session can use at most one left-hand and one right-hand device. Do not use two devices on the same side as inputs at the same time, or the left/right sources will not match the calibration files.
Device not detected or connection failure
- Confirm that the device is powered on and supplied correctly, and that the receiver or USB cable is firmly connected.
- After unplugging and replugging the device, wait for the system to finish detection, then click "Detect again".
- Close other programs that may occupy the device.
- If a device was working and then suddenly disconnected, stop the simulation first, then detect again or restart the desktop application.
- Record the on-screen message, device SN, time of occurrence, and the steps performed; enable Debug to reproduce the issue when necessary.
Gesture calibration
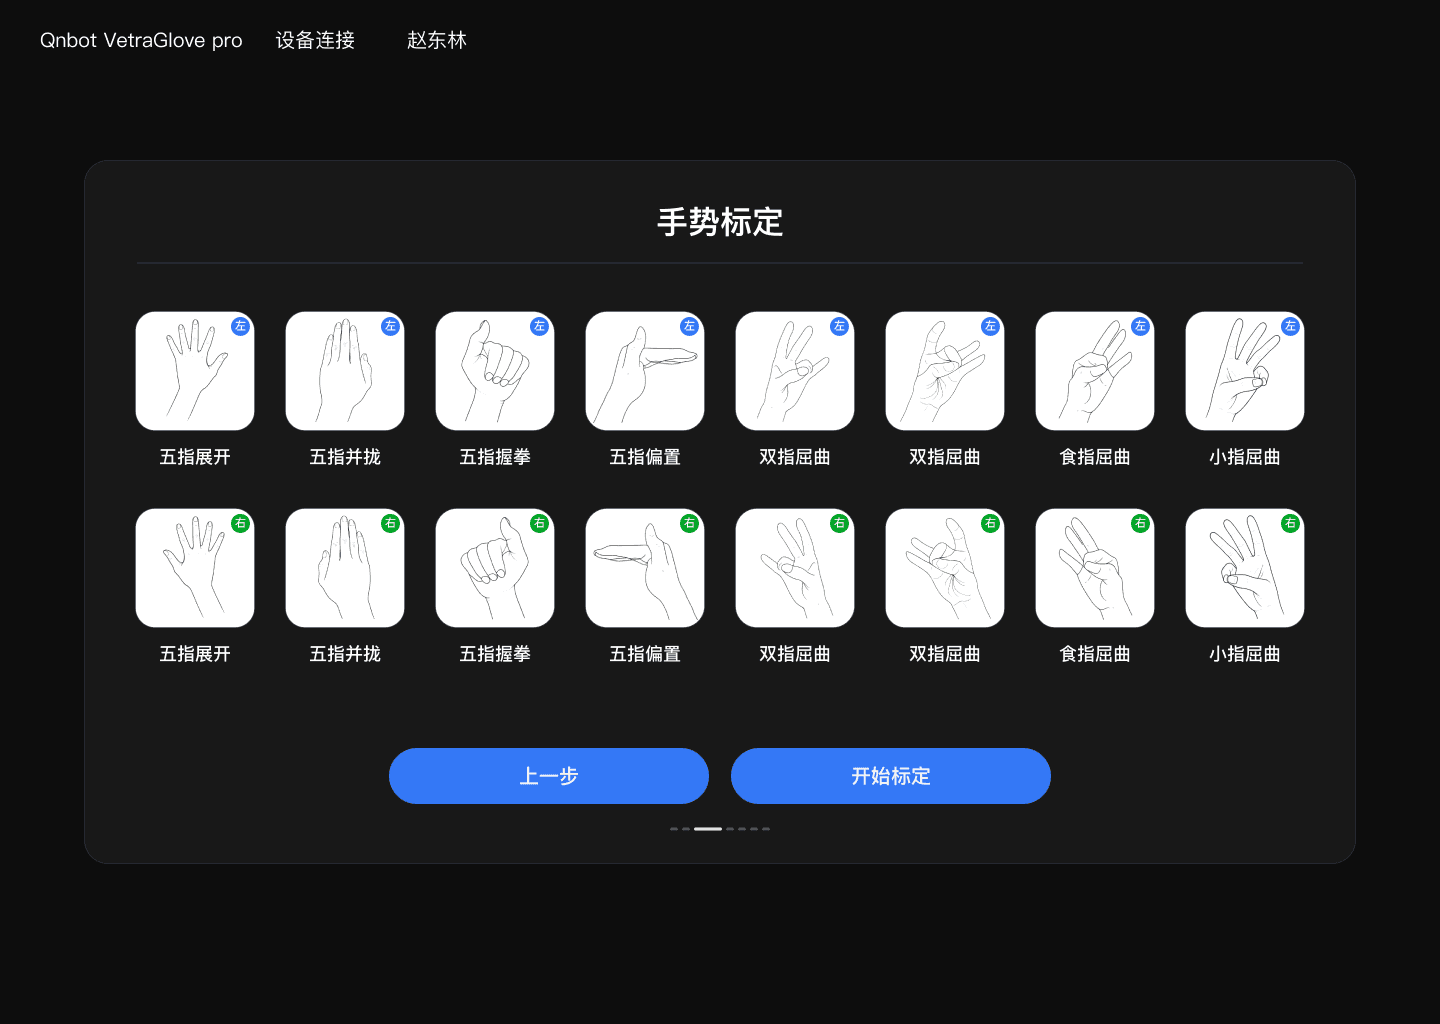
Calibration establishes the motion-mapping baseline for the current user, the current device, and the left or right hand. Calibrate each hand separately; re-calibration is recommended when the device or user changes or when the motion deviation becomes obvious.
Prerequisites for calibration
- The target device is connected and the left/right hand is selected correctly.
- The glove is worn properly, the wrist stays natural, and the sensing area is neither folded nor compressed.
- No simulation, update, or other program is occupying the device.
- The calibration area has suitable lighting and space so that the operator can hold the illustrated poses steadily.
Calibration poses
Calibration for each hand contains 8 steps: fingers spread, fingers together, fist, finger offset, two-finger flexion, two-finger flexion, index-finger flexion, and little-finger flexion. The two "two-finger flexion" steps correspond to different illustrated poses; follow the picture shown for the current step strictly, and do not rely on the text alone.
Motion principle: follow the hand illustrations, the left/right-hand indicator, and the step number in the wizard. Confirm only after the pose is stable; do not move the fingers while confirming, and do not apply excessive force to reach a pose.
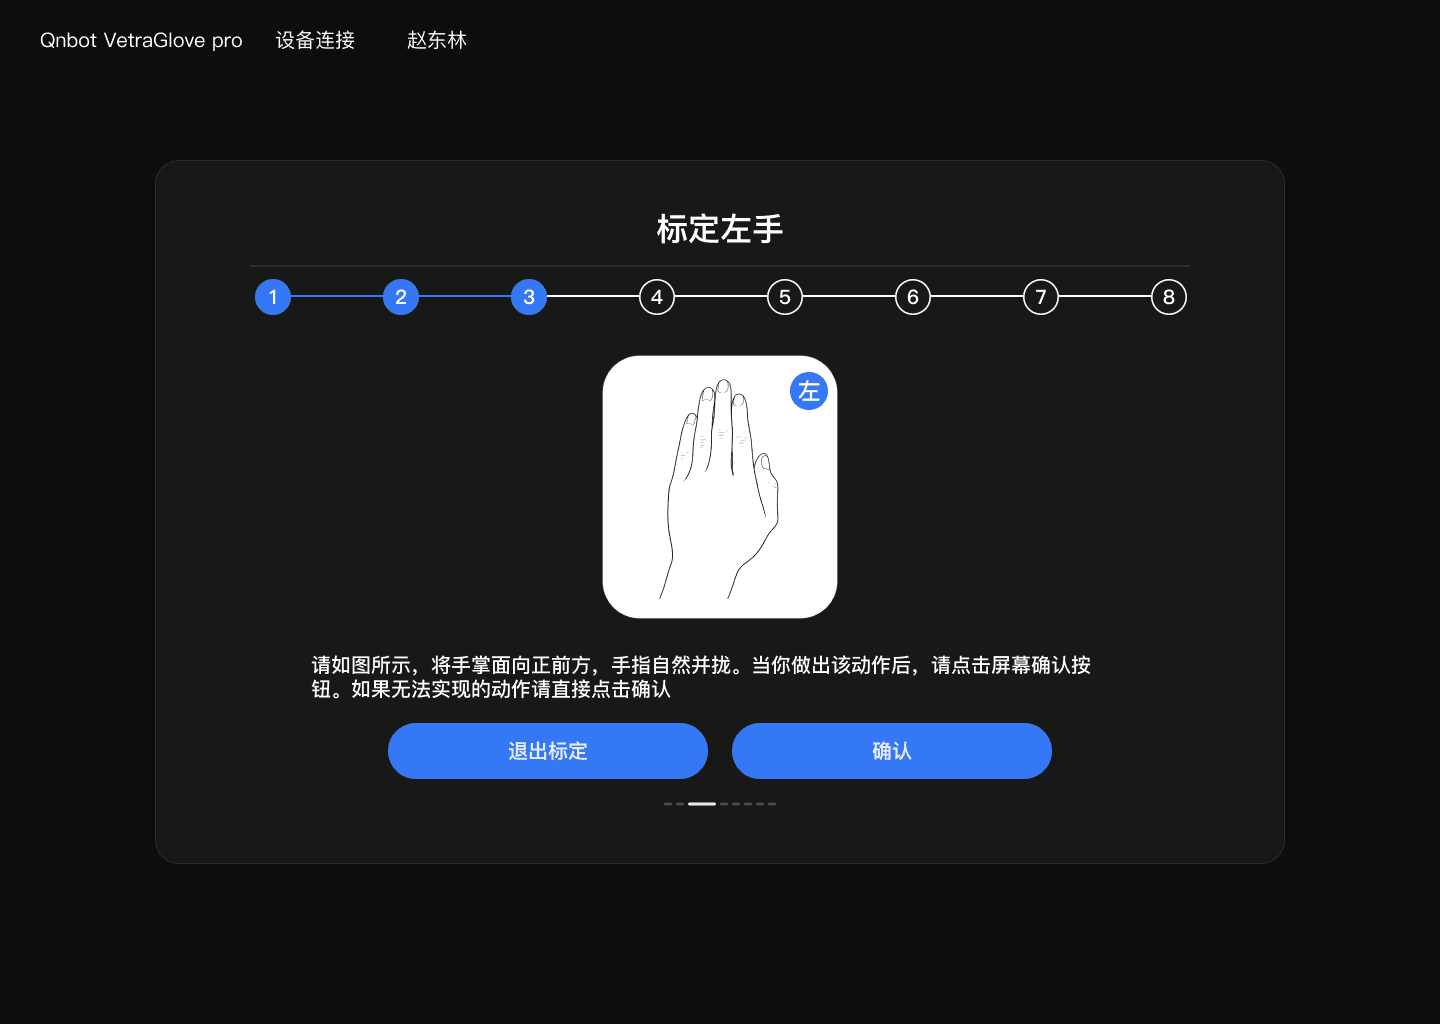
Performing calibration
- On the gesture calibration overview page, confirm that the left- and/or right-hand motion cards are fully displayed.
- Click "Start calibration". The system enters the step-by-step wizard for the corresponding hand.
- Check the "Calibrate left hand / Calibrate right hand" heading and the 1-8 step progress at the top of the page to confirm the current hand is correct.
- Assume the pose shown in the central illustration and read the step description. Handle poses you cannot perform according to the on-screen instructions.
- Once the pose is stable, click "Confirm" to advance. Repeat until all steps are complete.
- When the completion page appears, return to the main workflow and check whether the simulation input responds correctly.
Calibration quality assessment
| Check item | Acceptable result | Handling when unacceptable |
|---|---|---|
| Left/right hand | The on-screen hand matches the worn device | Exit, select the correct device/hand, and redo |
| Pose stability | Held for about 1 second without shaking before confirming | If the current step is abnormal, exit and repeat the full calibration |
| Model response | Opening, closing, and bending match the hand and direction | Check the input source and re-calibrate if necessary |
| Repeatability | Repeating the same motion gives similar model results | Check the wearing position, device state, and calibration file |
Bone-length calibration
Bone-length calibration uses a phone camera, a printed calibration board, and hand-landmark detection to capture the user's hand dimensions. After capture, the result is synchronized to the desktop application automatically and saved on the local computer.
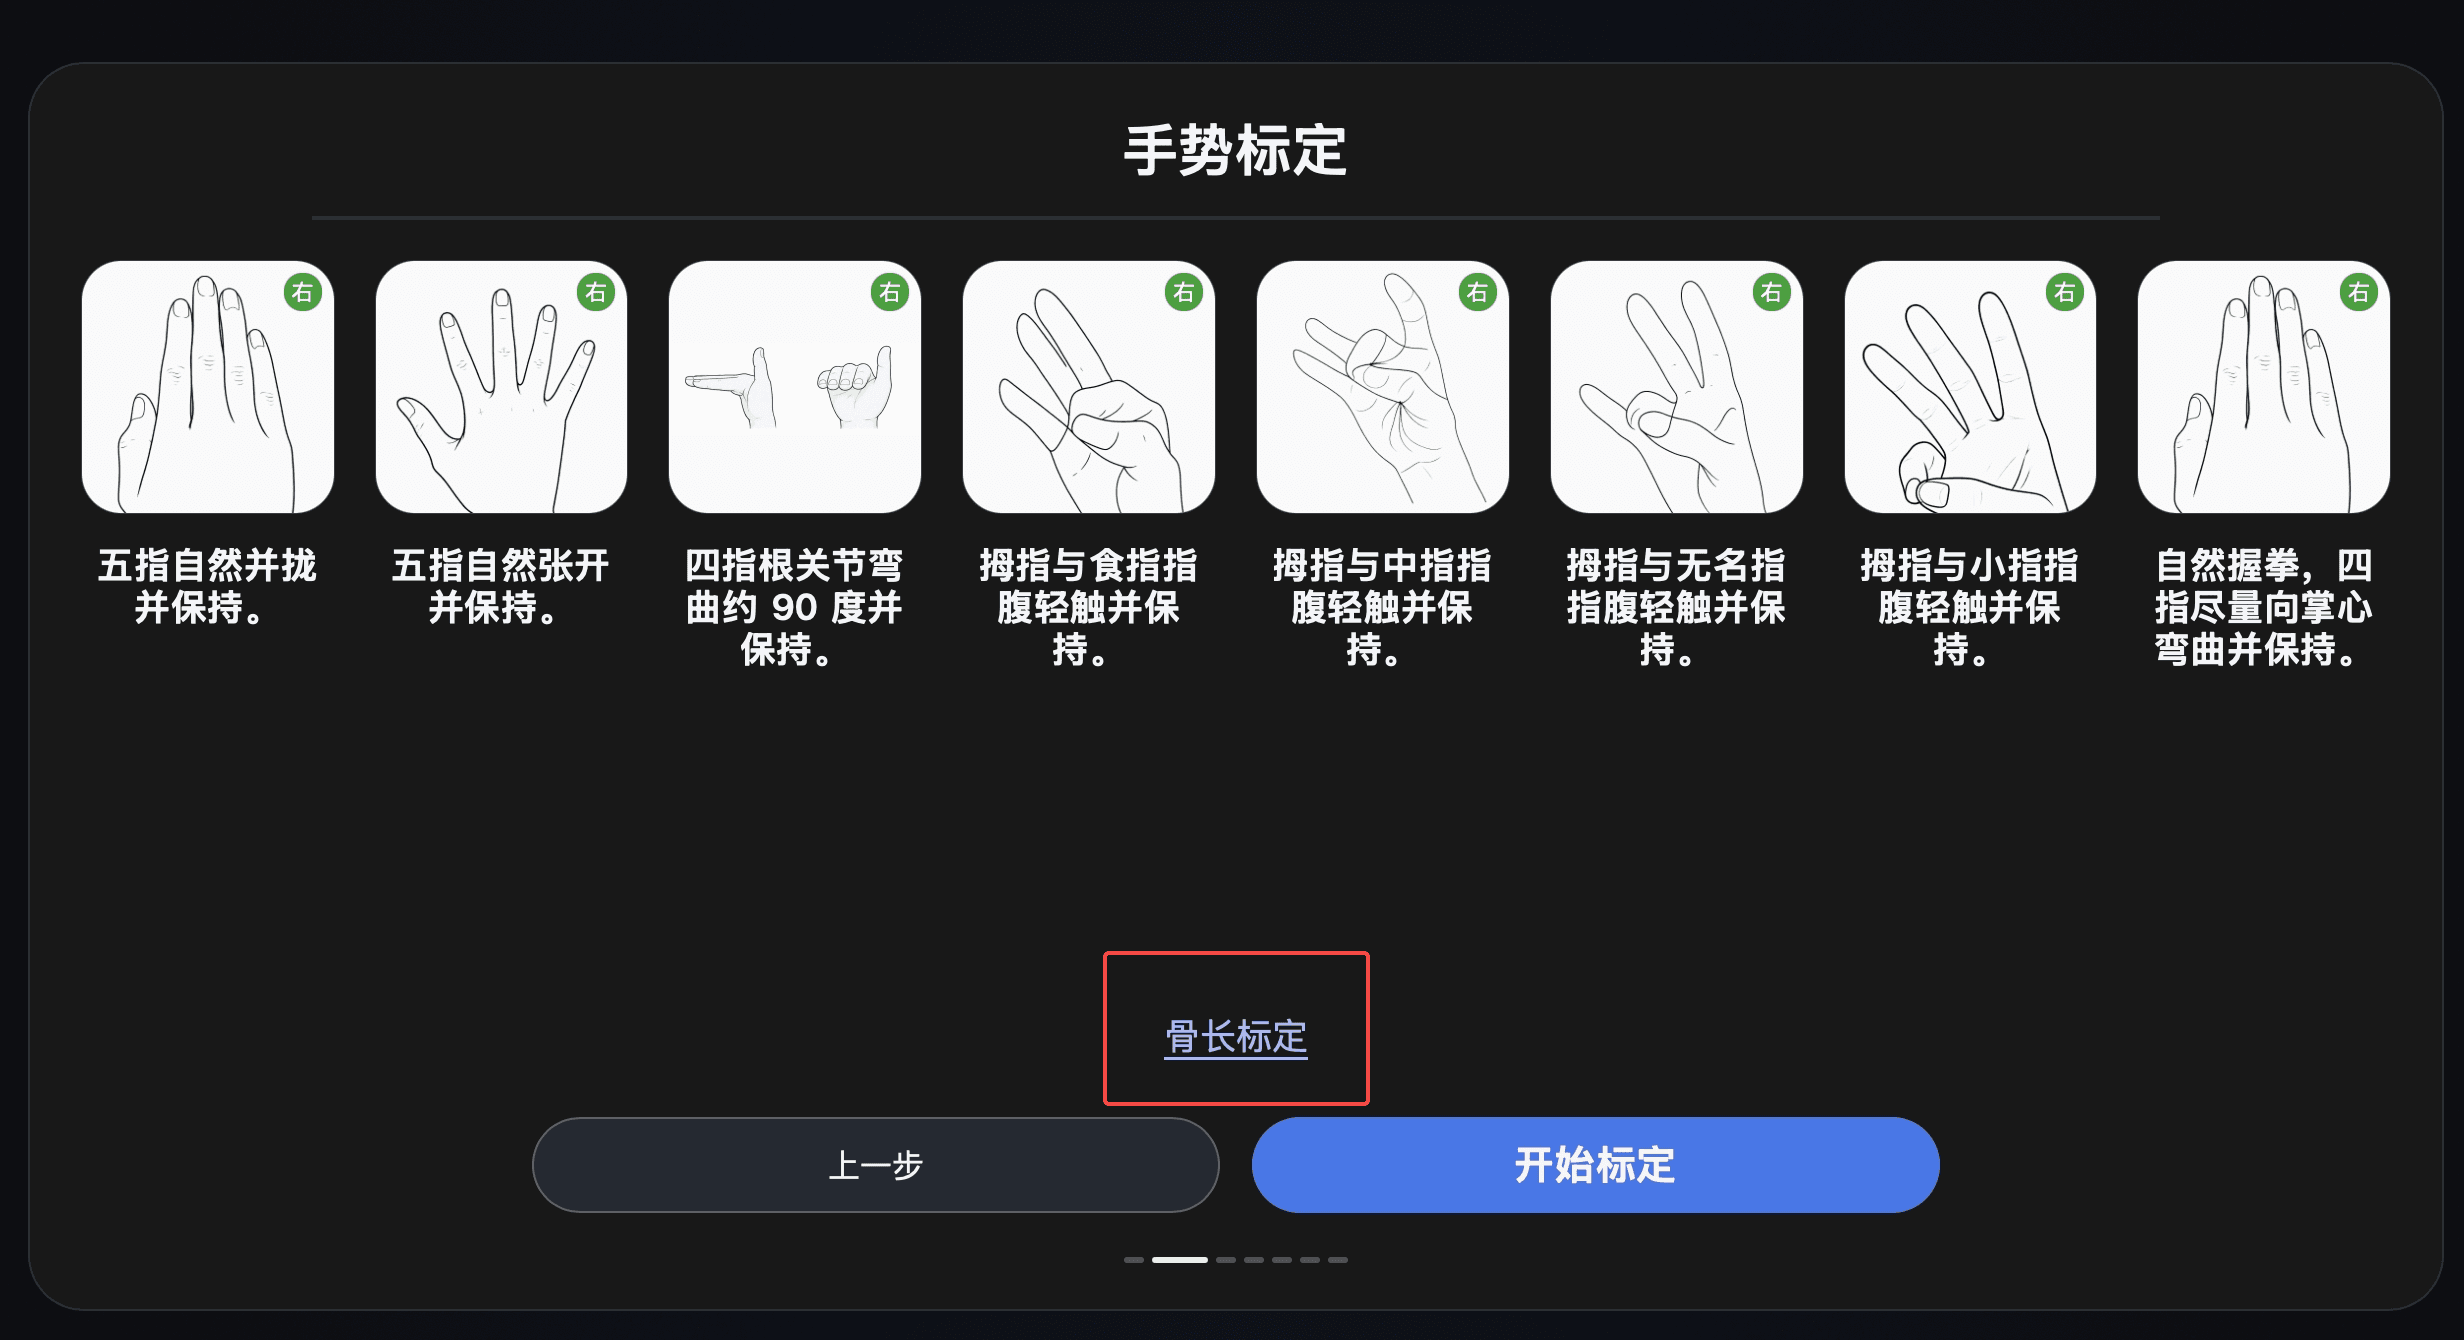
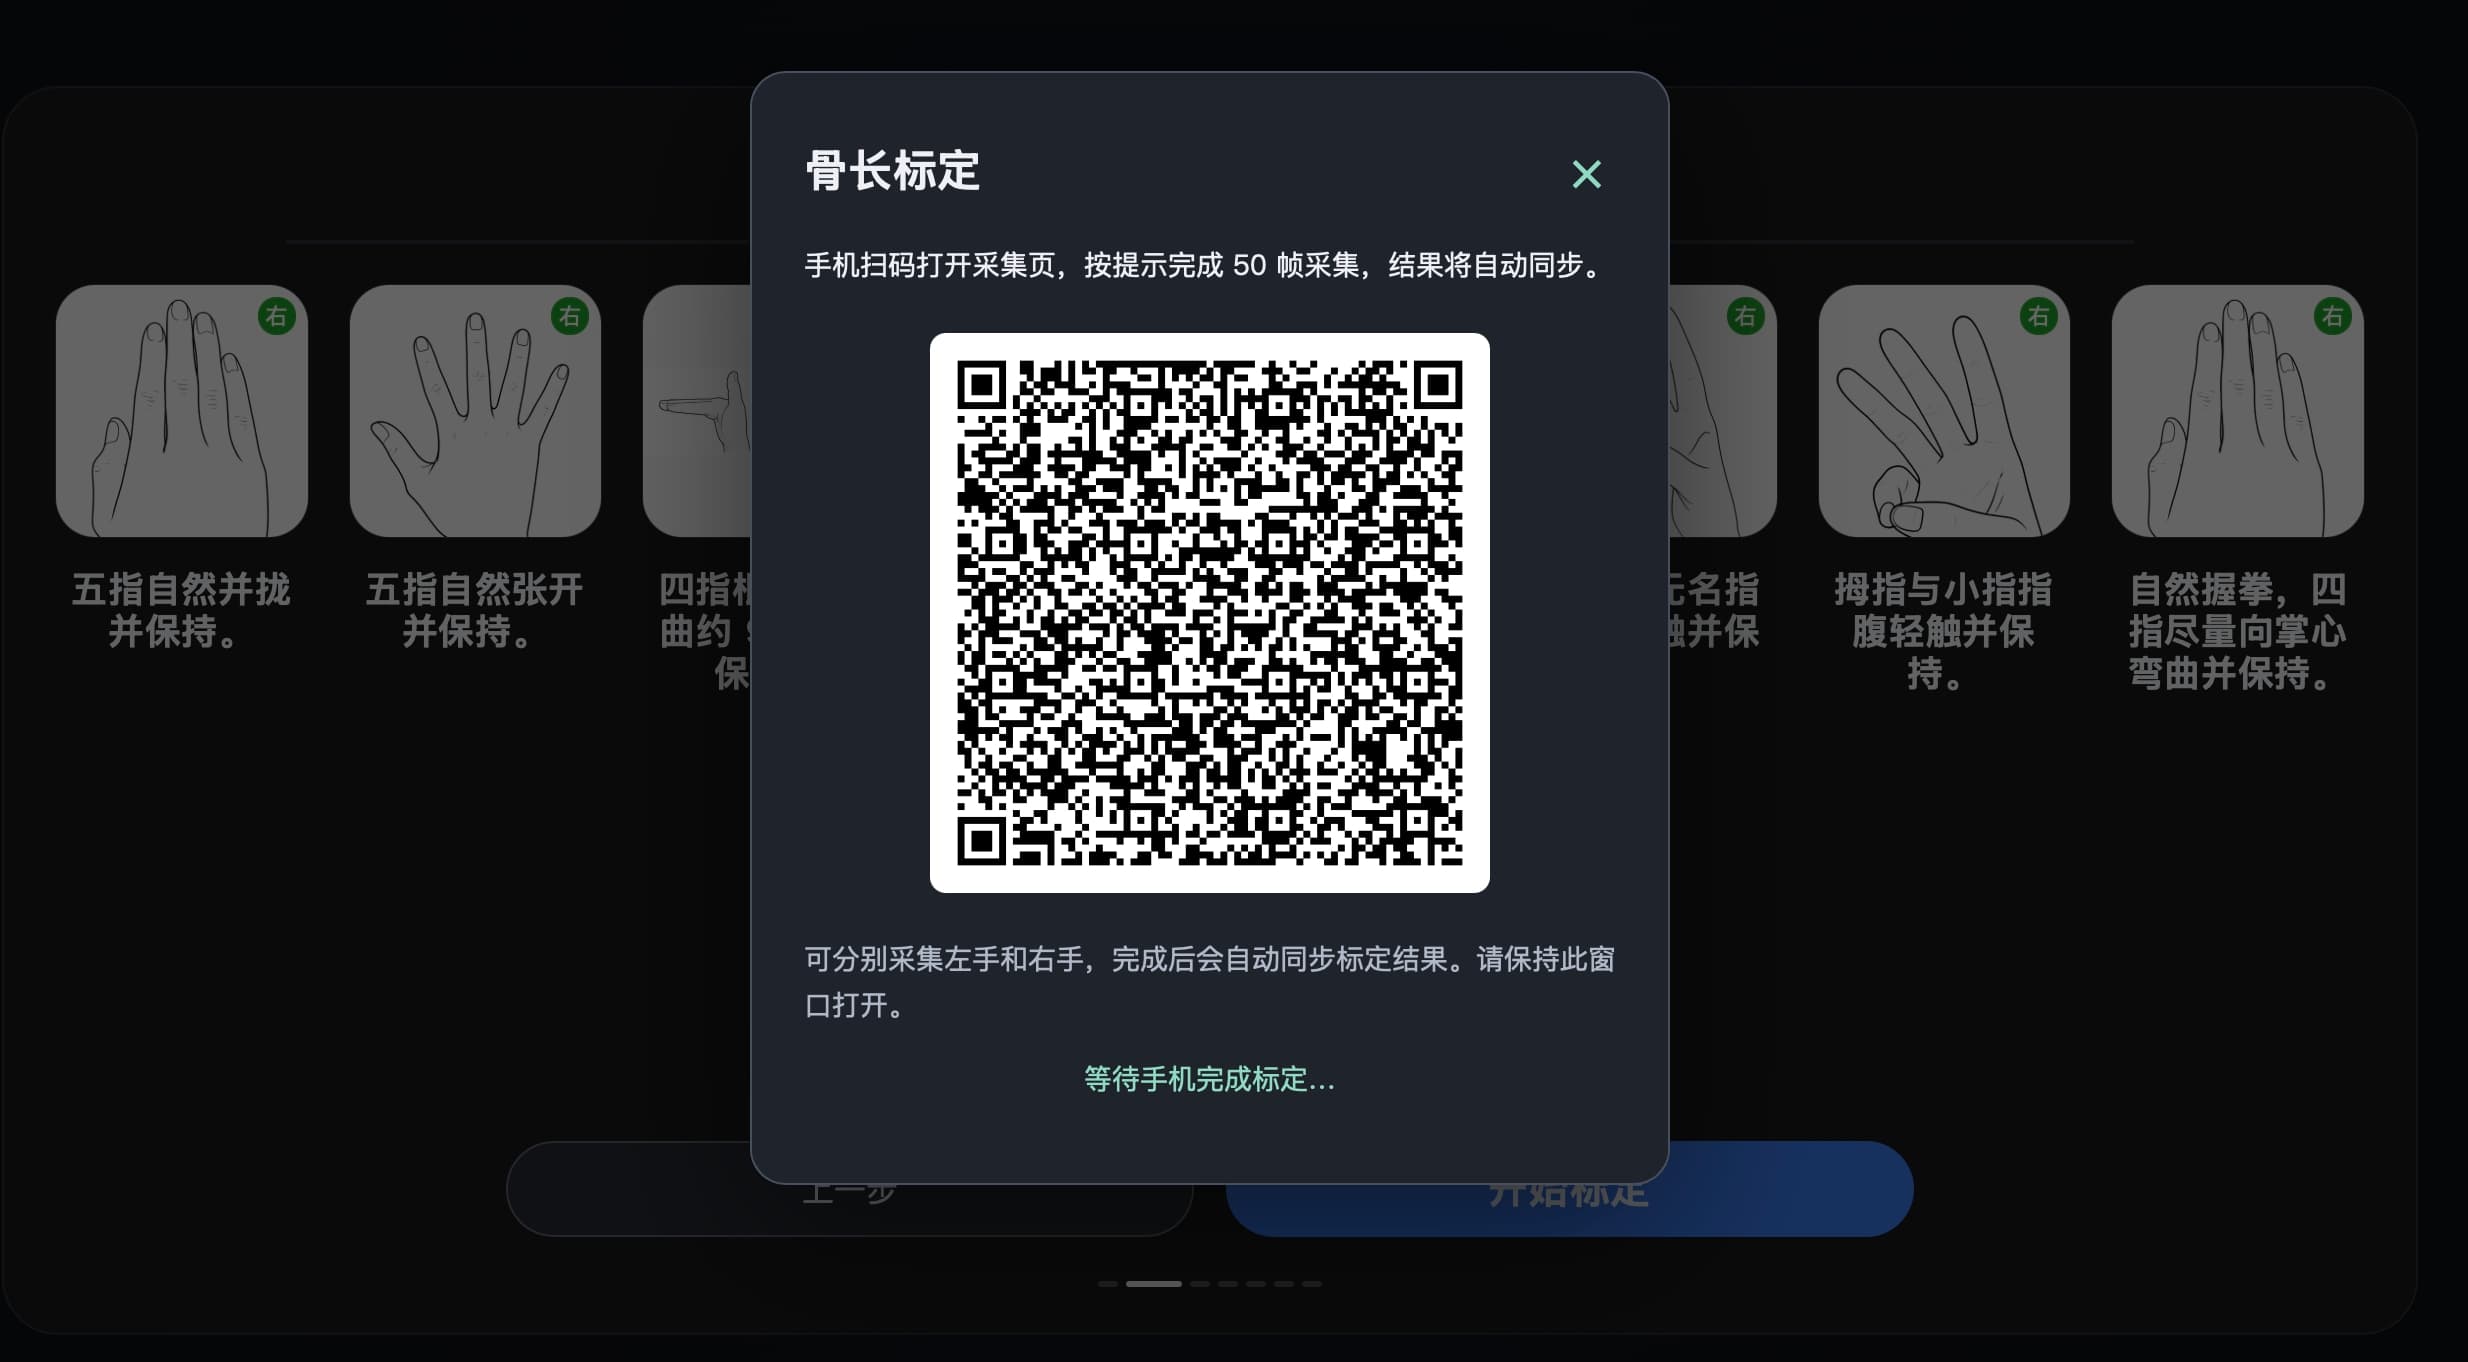
Open bone-length calibration and scan the QR code
- Click "Bone-length calibration" on the gesture-calibration page.
- When the desktop application displays a QR code, scan it with a phone to open the bone-length capture page.
- Keep the QR-code dialog open on the desktop while the phone completes calibration and synchronizes the result.
Download and print the calibration board
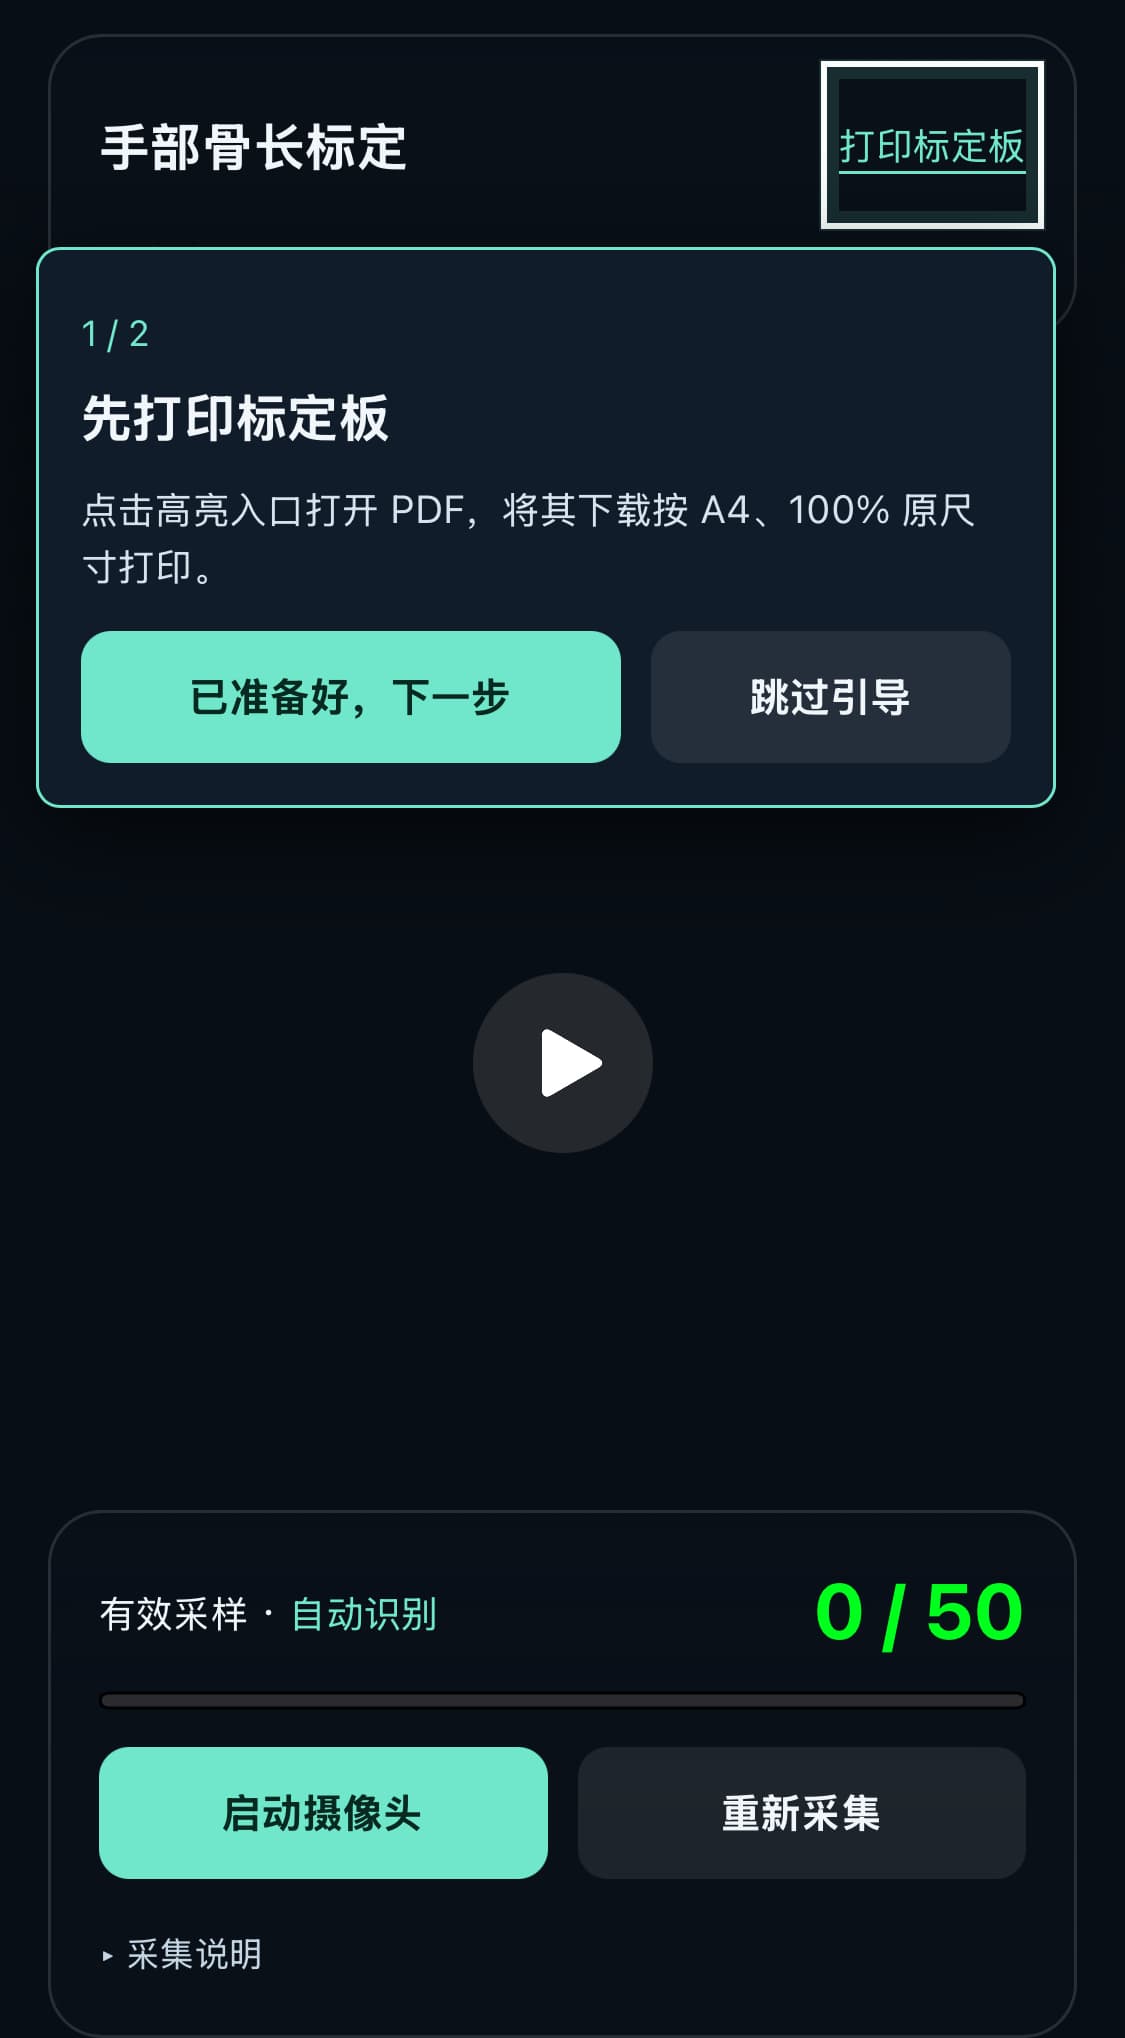
- On the phone, tap "Print calibration board" to download the board as a PDF.
- Print it on A4 paper at 100% actual size. Do not scale it or use "Fit to page".
- Place the board flat on a surface with even lighting and no obvious glare.
- After printing, tap "Ready, next".
Capture 50 frames with the camera
- Tap "Start camera" and allow the browser to use the phone camera.
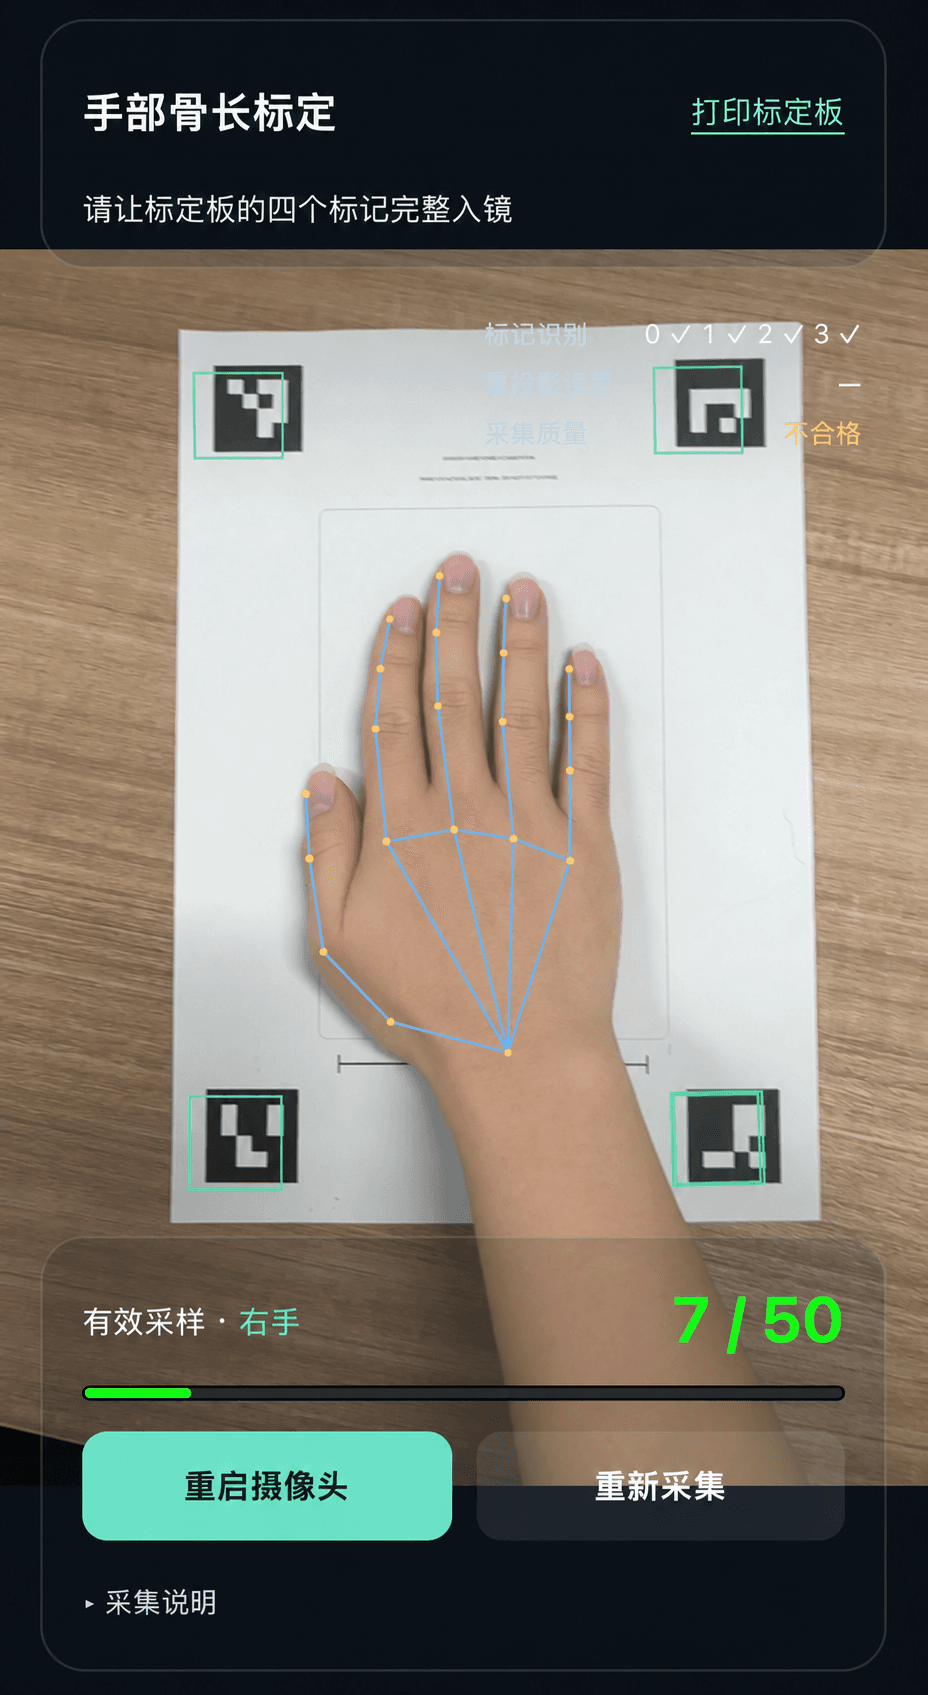
- Rest the hand being calibrated naturally in the center of the board. Keep all four corner markers fully visible and unobstructed by the hand or any other object.
- Adjust the phone until the page detects all four markers and the hand landmarks. The system identifies the left or right hand automatically; no manual selection is required.
- Keep the hand and board still until the valid-sample counter reaches
50 / 50. Frames with motion, occlusion, or insufficient recognition quality are not counted. - If the valid count does not increase for a while, adjust the lighting, angle, and distance so that all four markers are clearly visible. Tap "Capture again" if necessary.
 |  |
|---|---|
| Download and print the calibration board | Capture with all four corner markers visible |
Confirm synchronization and write success
After 50 valid frames, wait for the phone to finish processing. The result is synchronized automatically; the desktop page refreshes and displays "Bone-length calibration successful", confirming that the result for the current hand has been written and saved locally. Click "Done" to close the dialog, or "Continue calibration" to capture the other hand.
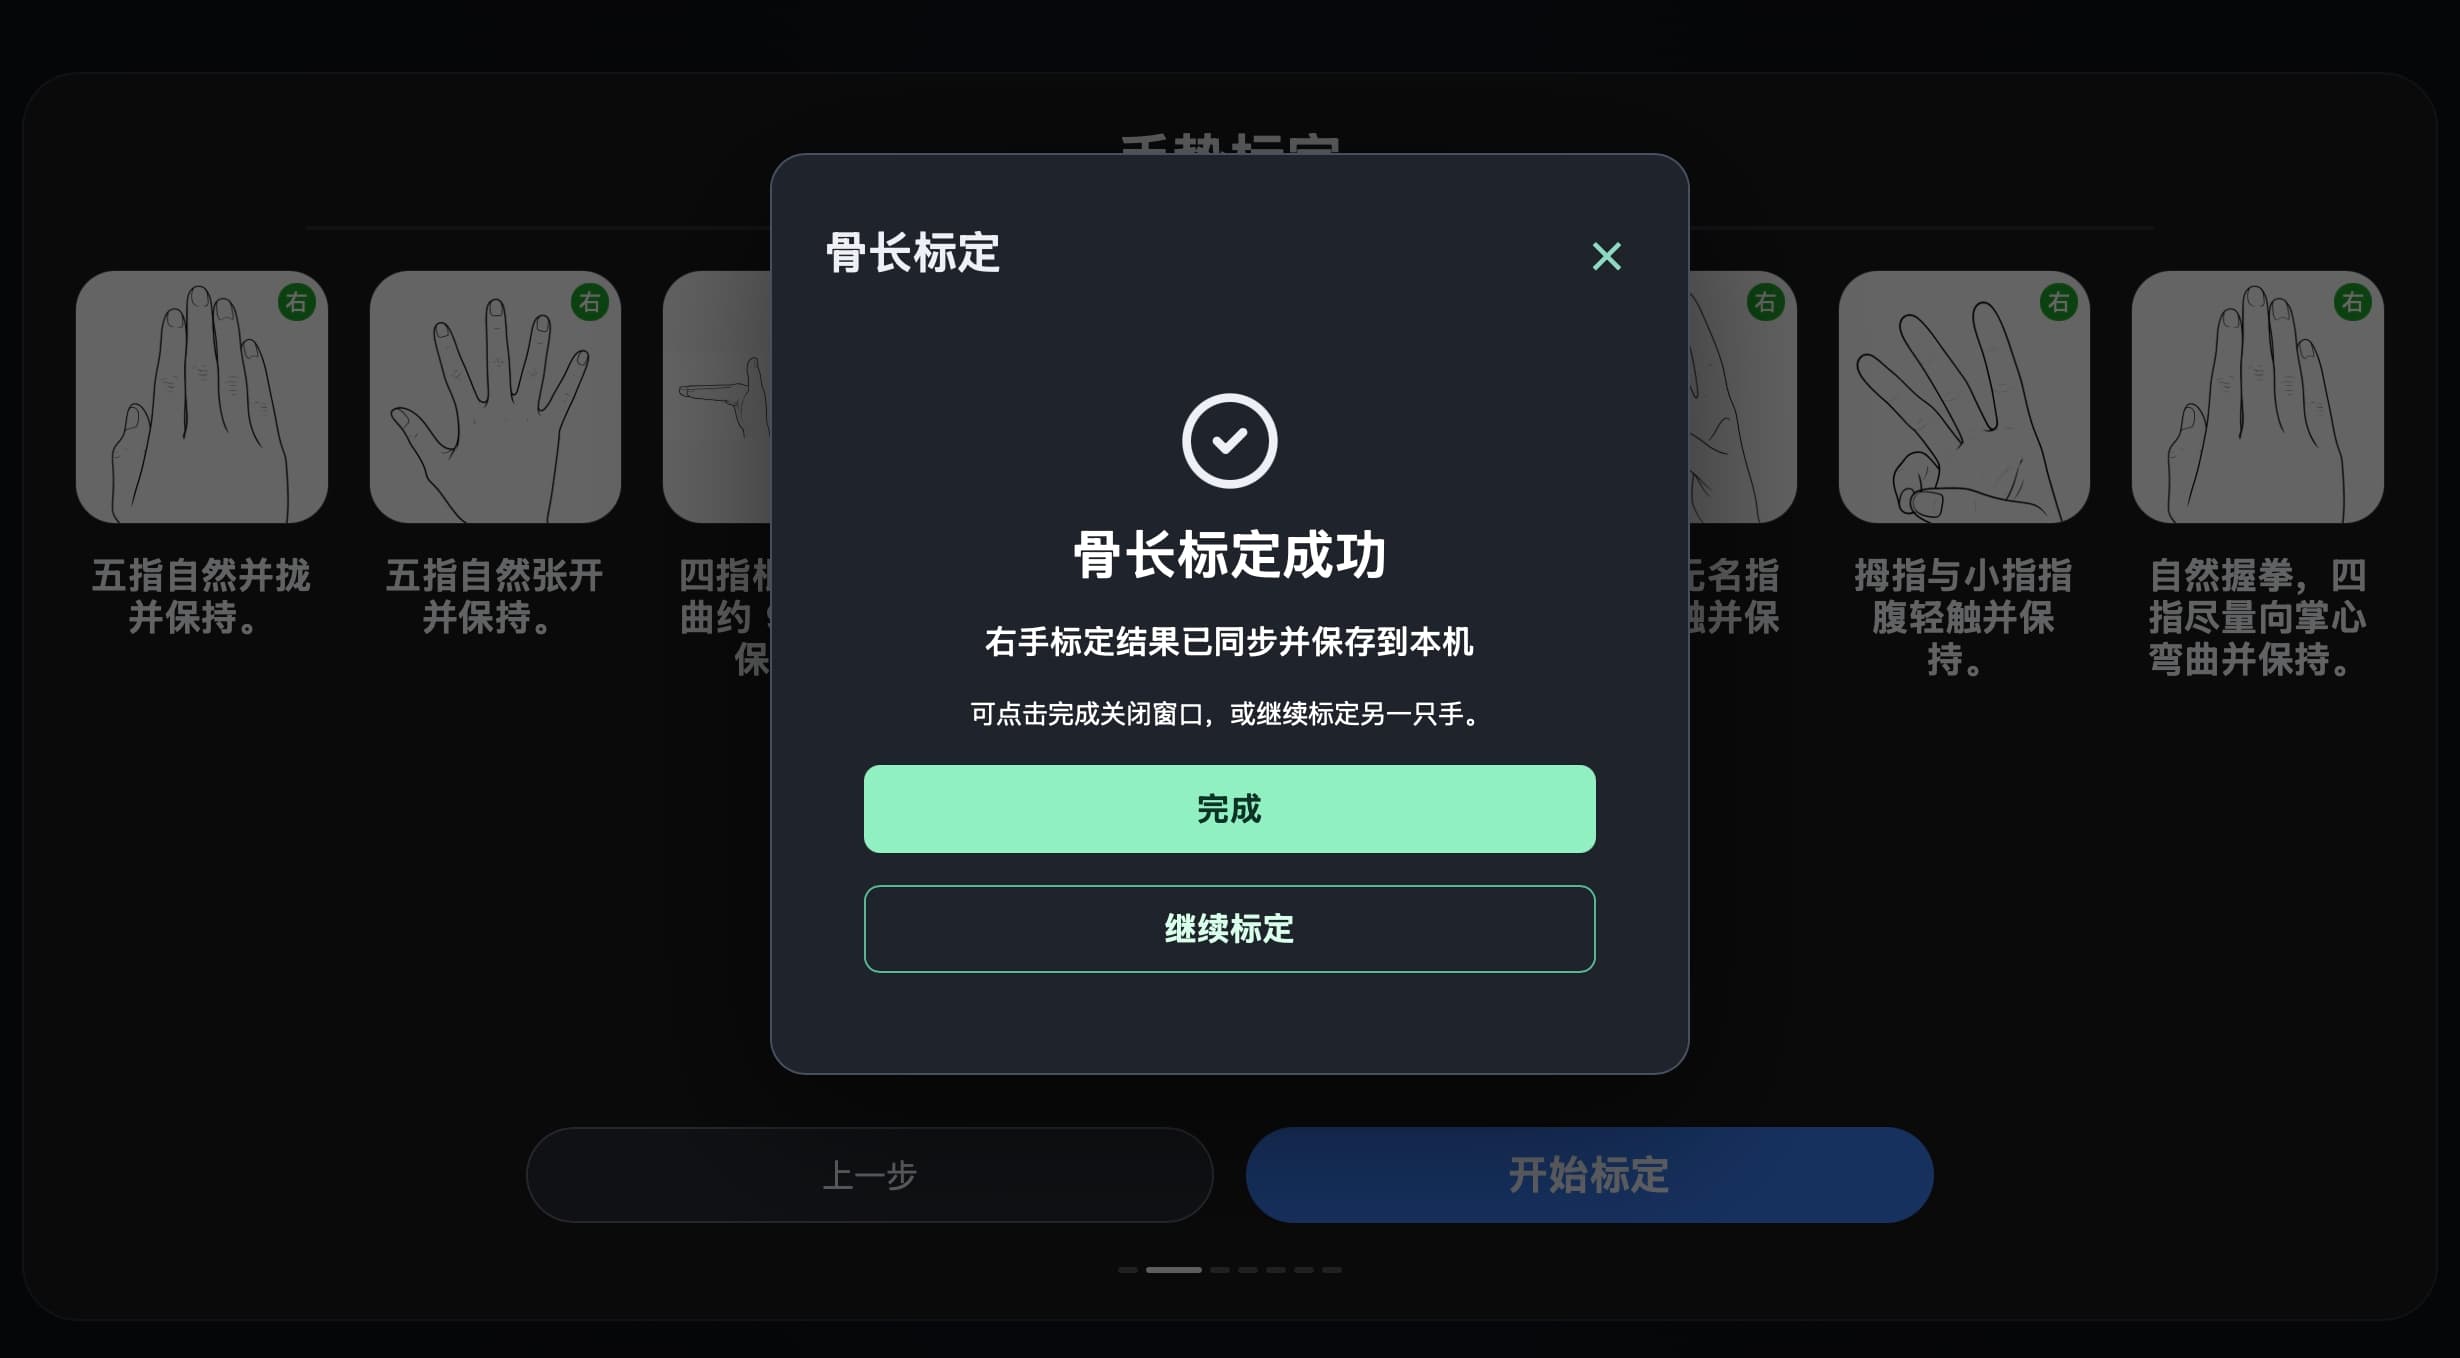
Overwrite rule: the system identifies the left and right hand automatically and stores their results separately. Calibrating the same hand again overwrites that hand's previous bone-length result.